what to do when your laptop sound doesn't work
Title: How to fix No Sound on Windows 10
Channel: The Geek Page
How to fix No Sound on Windows 10 by The Geek Page
what to do if your laptop sound doesn't work, what to do when your laptop sound isn't working, what to do when my laptop sound is not working, why has my sound stopped working on my laptop, why isn't my laptop sound not working
Laptop Sound Dead? FIX It NOW! (Easy Steps Inside)
Laptop Sound Woes? Let's Bring the Music Back!
It's a familiar, heart-stopping moment. You fire up your laptop, ready for a video call, a movie night, or some background music. Then, silence. Utter, frustrating silence. Your laptop sound is dead. Don't panic! We've all been there. Fortunately, fixing this is often easier than you think. We’ll go through troubleshooting steps to resurrect your audio. So, let's get your laptop singing again!
First Things First: The Obvious Checks
Before diving into complicated fixes, let's cover the basics. These initial steps may seem simple. However, they resolve numerous sound issues. Consequently, ruling them out saves substantial time.
- Volume Control: Is it muted? This is the most common culprit. Look for the mute button (usually a speaker icon) and make sure it's not activated. Check the volume slider in your system tray (lower right corner on Windows). Also, check the volume controls directly on your laptop's keyboard. Make sure the volume is turned up.
- Headphones/External Speakers: Are headphones plugged in? If so, the sound might be routing there. Unplug them to hear audio through your laptop's speakers. Likewise, if you have external speakers connected, make sure they're turned on and connected properly.
- Restart Your Laptop: A simple restart can often resolve temporary glitches. This can often clear up minor software conflicts. After restarting, check your sound again.
Digging Deeper: Software Solutions
If the basic checks don’t work, let's investigate software-related issues. These problems are frequently the cause of sound problems.
- Audio Driver Updates: Outdated or corrupted audio drivers are frequent offenders. Think of them as the translators between your operating system and sound card. To update:
- Windows: Right-click the Start button. Select "Device Manager." Expand "Sound, video and game controllers." Right-click your audio device (e.g., "Realtek Audio"). Choose "Update driver." Windows will search for the latest drivers.
- Mac: Apple generally handles driver updates automatically through system updates. Ensure your macOS is up-to-date in System Preferences.
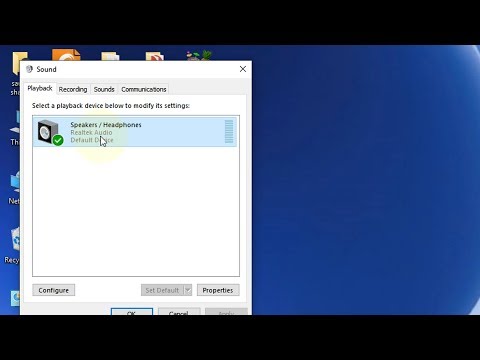
- Check Sound Settings: Within your operating system's sound settings, confirm the correct output device is selected. Sometimes, the system defaults to the wrong audio device.
- Windows: Right-click the speaker icon in the system tray. Select "Open Sound settings." Then, choose the correct output device.
- Mac: Go to System Preferences > Sound > Output. Select your laptop's speakers.
- Troubleshoot Audio: Windows and macOS have built-in audio troubleshooters. They can often detect and fix common problems automatically.
- Windows: Right-click the speaker icon in the system tray. Select "Troubleshoot sound problems."
- Mac: Open Applications > Utilities > Audio MIDI Setup, and check your audio device settings.
Hardware Hurdles: When Things Get Physical
If software updates aren’t the answer, hardware may be the problem. Don't fret, physical issues can also be managed.
- Speaker Issues: Your laptop's internal speakers might be damaged. This is more common with older machines. Try connecting external speakers to see if you get sound. If external speakers work, the problem is with your laptop's speakers.
- Headphone Jack Problems: The headphone jack can get damaged or dirty. Try wiggling a headphone plug in the jack to see if you momentarily get sound. Be gentle! Also, look inside the jack. Sometimes lint or debris causes problems.
- Audio Card Failure: In rare cases, the sound card itself can fail. This is more likely in older laptops. If other troubleshooting steps fail, you might need professional repair.
Additional Tips and Tricks
Here are some extra tricks to try. These options can often provide a quick fix.
- Check for Malware: Sometimes, malware interferes with audio functionality. Run a full system scan with your antivirus software.
- Reinstall Audio Drivers (Advanced): If updating doesn't work, try uninstalling and reinstalling the audio drivers. Go to Device Manager (Windows) or the equivalent on Mac. Then, uninstall the sound device. Restart your laptop. The OS will automatically try to reinstall the drivers.
- System Restore (Windows): If the problem started recently, consider using System Restore to revert your system to a previous state. This will undo any recent changes that may have caused the issue.
- Professional Help: When all else fails, don't hesitate to seek professional help. A computer repair shop can diagnose and fix hardware issues more accurately.
Conclusion: Back in Harmony!
Dealing with laptop sound issues can be annoying. However, following these steps will guide you through most troubleshooting scenarios. Now, you're equipped to diagnose and fix the problem. In most cases, you'll get your laptop's sound back up and running. So, go ahead, test your audio, and enjoy the sounds you love!
Dell Laptop Keyboard Nightmare: FIXED! (Easy Steps Inside)Laptop Sound Dead? FIX It NOW! (Easy Steps Inside)
Hey there, fellow tech enthusiasts! Ever felt that sinking feeling when you fire up your laptop, ready to binge-watch your favorite show or blast some tunes, only to be met with…silence? Yep, we’ve all been there. That dreaded moment when your laptop sound is dead can be a real mood killer. But don’t worry, put down the duct tape and the frantic Google searches – we’re here to help. We've all experienced the frustration of muffled audio, crackling noise, or, worst of all, complete silence emanating from our beloved laptops. Think of it like a symphony orchestra suddenly cutting out mid-performance – a jarring experience, to say the least. So, grab your virtual detective hat; we're about to unravel this audio mystery and get your laptop singing again.
1. The Silent Treatment: Why Your Laptop Suddenly Went Mute
First things first, let’s figure out why your laptop sound is AWOL. It's like trying to diagnose a car problem; you wouldn't just start replacing parts willy-nilly! This understanding will help us swiftly pinpoint the root cause and implement the correct fix. It's often a simple oversight, a misplaced setting, or a minor glitch. Think of your laptop's audio system as an intricate network of wires and software. Perhaps a particular setting is muted or a driver is not correctly installed. Alternatively, physical wear-and-tear or external hardware problems can also render sound nonexistent. Let's delve into the common culprits.
2. Check the Obvious: Basic Troubleshooting 101
Okay, before we dive into the deep end, let’s start with the basics. Sometimes, the simplest solutions are the most effective. It’s like finding your keys – you wouldn’t dismantle your car engine before checking your pockets first, right?
- Volume Control: This seems like a no-brainer, but trust me, it's caught many of us off guard. Is your volume all the way down? Is the speaker icon muted in the system tray (that little area in the bottom right corner of your screen)? Click on the speaker icon, and drag the volume slider up. If the icon has a 'muted' cross over it, click it to unmute the volume.
- Headphones/External Speakers: Are headphones or external speakers plugged in? If so, the sound might be routing through them instead of your laptop's speakers. Unplug them, or check the default audio output settings (we'll get to that shortly).
- Restart Your Laptop: This is the digital equivalent of "turning it off and on again." Sometimes, a simple restart can clear up minor software glitches that are causing the sound issues.
- Check Your Connections: If you are employing external speakers or headphones, ensure the input cable are correctly inserted into the appropriate port.
3. Dive Deeper: Audio Settings and Device Configuration
Now, let’s get a little more technical. This is where we start poking around in the settings. It's like tuning an instrument; you need to adjust the fine details to get the perfect sound.
- Sound Settings: Go to your operating system's sound settings. In Windows, you can typically find these by right-clicking the speaker icon in the system tray and choosing "Open Sound Settings." In macOS, head to "System Preferences" and then "Sound." From there, make sure the correct output device (your laptop speakers) is selected.
- Device Manager (Windows): Open the Device Manager (search for it in the Windows search bar). Expand "Sound, video and game controllers." Are there any devices with a yellow exclamation mark or red X? This indicates a driver issue. More on that in the next section.
- Volume Mixer: Within your sound settings, there's often a volume mixer. This allows you to control the volume of individual applications. Make sure the volume for the app you're using (e.g., your web browser, music player) isn't muted or turned down.
4. Driver Dilemma: The Key to Audio Revival
Drivers are the software "translators" that allow your operating system to communicate with your audio hardware. Think of them as the crucial link between your computer and your speakers, headphones or external speakers. If the driver's missing, outdated, or corrupted, that sound just won't happen. It's like trying to speak a language your laptop just doesn't understand!
- Driver Updates: This is the most common fix. Go back to that Device Manager. If you see a problem with your audio device, right-click it and select "Update driver." Choose "Search automatically for drivers." Let Windows attempt to find the latest drivers.
- Manual Driver Installation: If the automatic update doesn't work, you might need to download the latest drivers from your laptop manufacturer's website (Dell, HP, Lenovo, etc.). You'll need to know your laptop model.
- Driver Rollback: If the sound issue started after a driver update, try rolling back to a previous driver version. In Device Manager, right-click the audio device, select "Properties," go to the "Driver" tab, and click "Roll Back Driver" if the option is available.
5. Software Conflicts: When Apps Cause Chaos
Sometimes, the issue isn't with your hardware or settings, but with software conflicts. It’s like having too many cooks in the kitchen; things get messy! Certain applications can interfere with audio playback.
- Conflicting Software: Some applications have been known to interfere with audio drivers. Close any unnecessary programs, especially those that might use audio (e.g., music players, video editing software, screen recorders). Test.
- Audio Enhancement Software: Many laptops come pre-loaded with audio enhancement software (like Realtek Audio Manager). These can sometimes cause issues. Try disabling or uninstalling them to see if that resolves the problem.
6. The Hardware Hurdle: When It's Not Just Software
Unfortunately, sometimes the problem isn't software. It could be a hardware issue. It might be as simple as a loose speaker cable or as complex as a fried audio chip.
- External Speakers/Headphones Test: The quickest test is to use another speaker or a set of headphones. If the audio works with these, the problem is likely with your laptop's internal speakers.
- Check Speaker Cables: If you’re comfortable doing so (and your laptop allows), consider opening it up and checking the speaker cables (this will typically void your warranty, so be careful!).
- Professional Help: If you've tried everything and the sound still isn't working, it might be time to take your laptop to a qualified repair technician.
7. Audio Troubleshoot: Windows Diagnostic Tool
Windows has a built-in audio troubleshooter that can detect and fix common audio problems.
- Accessing the Troubleshooter: Right-click the speaker icon located in the bottom right corner of your screen. Then, click "Troubleshoot sound problems," and allow the troubleshooter to detect and attempt to repair the problem.
- Following the Instructions: Just follow the specific instructions provided by the built-in tool. Depending on the problem, the tool will attempt to fix the problem or guide you to the appropriate settings.
8. macOS Specific Considerations: Troubleshooting Audio on Apple Devices
Apple computers, while known for their reliability, can occasionally experience audio issues. Let's explore some Mac-specific troubleshooting steps.
- Restarting Your Mac: A simple restart can often resolve temporary glitches.
- Checking the Output Device in System Preferences: Navigate to System Preferences > Sound > Output. Make sure your sound is directed toward the correct output, either internal speakers or connected headphones/speakers.
- Updating macOS: Ensure that your macOS is the most up-to-date version. Software updates often include improvements for sound and other audio-related components.
- Resetting NVRAM/PRAM: NVRAM (Non-Volatile Random-Access Memory) stores certain settings for your Mac. Resetting NVRAM can fix problems related to sound. Turn off your Mac, then turn it on again while holding down these four keys simultaneously: Option, Command, P, and R. You can release the keys when you hear the startup chime for the second time.
- Using Audio MIDI Setup: The Audio MIDI Setup utility can be used to configure audio devices. The utility can be found within the Utilities folder in your Applications folder. Verify that your device is configured to correct settings.
9. Preventative Measures: Keeping the Sound Flowing
Prevention is always better than cure. Implementing these simple practices can help ensure your laptop audio remains crystal clear.
- Regular Software Updates: Keep your operating system, drivers, and applications up-to-date. This includes audio drivers. Software updates usually contain crucial fixes.
- Avoid Suspicious Downloads: Be cautious about downloading software from untrusted sources, as they could contain malware that can interfere with audio functionality.
- Clean Up Your System: Regularly clear out unnecessary files and programs to free up resources for optimal system performance.
- Protect Your Laptop: Shield it from potential physical damage that can affect components such as speakers.
10. The Role of External Devices: Enhancing Your Audio Experience
Sometimes, your laptop's built-in audio isn't enough. External devices can radically amplify and improve your audio experience.
- External Speakers: Providing a richer,
Fix No Sound on TV when connected to Laptop with HDMI in Windows 11 10 - How To Solve hdmi Sound

By Victor Explains Fix No Sound on TV when connected to Laptop with HDMI in Windows 11 10 - How To Solve hdmi Sound by Victor Explains
100 SOLVED - No Output Devices Found Windows 1110 Fix Windows 1110 Sound Not Working Problem

By How To Fix Tech 100 SOLVED - No Output Devices Found Windows 1110 Fix Windows 1110 Sound Not Working Problem by How To Fix Tech
My Laptop Sound Not Working How To Fix Windows 10 Laptop No Sound Not Working Problem

By FIXsage My Laptop Sound Not Working How To Fix Windows 10 Laptop No Sound Not Working Problem by FIXsage

Title: FIXED windows 10 no sound from headphones 2025 windows 10 no sound headphones
Channel: Etechniz
FIXED windows 10 no sound from headphones 2025 windows 10 no sound headphones by Etechniz
Wifi On Laptop Phone
Laptop Sound Dead? FIX It NOW! (Easy Steps Inside)
Is the silence from your laptop speakers deafening? Have you suddenly found yourself staring at a blank screen, bereft of the familiar sounds that accompany your digital life? Don't despair – we can diagnose and, more importantly, resolve this common issue. This isn't a complex technical ordeal; in many cases, the solution lies just a few clicks away. Let’s dive in and restore those crucial audio cues.
1. The Initial Sound Check: Is It Really the Laptop?
Before we embark on an intricate troubleshooting journey, let's establish the source of the problem. The first step is to determine if the audio issue is confined to your laptop or is a wider systemic problem. A quick and painless sanity check can save you a lot of time and potential frustration.
External Speakers or Headphones: Connect a pair of external speakers or headphones to your laptop's audio output jack. Do you hear sound now? If the audio is restored when using external devices, the problem very likely lies within your laptop's internal speakers or their associated circuitry. Conversely, if the audio remains absent, the issue is likely software-related, or a more fundamental hardware problem.
Bluetooth Devices: If you're a Bluetooth enthusiast, see if your laptop's audio is being routed through a paired device. Disconnect any Bluetooth headphones or speakers that may be connected. Try playing audio again to see if the sound returns.
The Silent Treatment: Different Media Sources? Try playing different audio files. Test YouTube videos, locally stored music files, and even system sounds. Does the audio fail across all of these? This can pinpoint the probable location of the problem.
2. Software Solutions: Reanimating the Audio Drivers
Assuming the hardware checks out, the next step is to examine the software aspects that manage your sound. Drivers are the unsung heroes of your digital world. They allow your operating system to communicate with your sound devices. Without them, you’re essentially experiencing digital deafness.
Driver Updates: The Digital Maintenance: Your sound card’s drivers may have fallen out of date. Outdated drivers are a significant source of audio hiccups. Locate your device manager, usually accessed by searching "Device Manager" in the Windows search bar.
- Expand the "Sound, video and game controllers" section.
- Right-click on your audio device (it may be listed as "Realtek Audio," "Intel Display Audio," or a similar brand).
- Select "Update driver." Choose the option to search for updated drivers automatically. Windows will attempt to locate and install the most current drivers.
Driver Rollback: The Reversal: If the problem started after a recent driver update, the newest driver isn't necessarily the best driver. You can roll back your driver to a previous version. In Device Manager, right-click your sound device and select "Properties." Then, navigate to the "Driver" tab. If the "Roll Back Driver" option is available, click it. This will revert to the previously installed driver version.
Driver Reinstallation: The Software Refresh: If updates or rollbacks don't work, consider reinstalling the driver. In Device Manager, right-click your audio device, select "Uninstall device," and then confirm the removal. Restart your laptop. Windows should automatically reinstall the default driver upon restarting. If not, download the correct driver from the manufacturer's website (e.g., Realtek, Intel) and install it.
3. Volume Controls: The Obvious, Often Overlooked
Sometimes, the simplest solutions prove the most elusive. Don't underestimate the power of the volume controls!
System Volume Check: Ensure that the master volume in Windows isn't muted or set to an extremely low level. Click the speaker icon in the system tray (lower-right corner of your screen). Adjust the volume slider. Also, make sure the "mute" button is not activated.
Application-Specific Volume: Some applications have their own independent volume controls. For example, many media players, video conferencing software, and web browsers have individual volume settings. Check each application's volume controls.
Hardware Volume Buttons: Check the physical volume buttons on your laptop. Sometimes they are accidentally bumped.
4. Audio Enhancements and Settings: The Soundscape Architects
Your operating system likely includes built-in audio enhancement features. These features, when improperly configured, may sometimes cause conflicts or distortions.
Windows Sound Settings: Right-click the speaker icon in the system tray and select "Open Sound settings".
- Output Device Check: Verify that the correct output device is selected (e.g., your laptop speakers, not a connected Bluetooth device by mistake).
- Device Properties: Click on your output device and explore the "Properties" panel. Ensure that the volume level is appropriate and that any enhancements or effects are properly configured.
- Troubleshoot: Windows often includes a built-in troubleshooter to identify and fix common audio issues.
Manufacturer's Audio Software: Many laptop manufacturers include custom audio management software alongside the operating system. This software might provide settings for sound profiles, equalization, or other audio enhancements. Explore this software (often found in the system tray or accessible through the Windows search bar) and ensure that its settings are configured correctly.
Audio Format & Bit Rate: Ensure that the audio output format and bit rate settings are accurately configured for your laptop's capabilities. Consider experimenting with various bit rates or audio quality settings to find the optimal performance.
5. Hardware Inspections: Peering into the Physical Realm
If software troubleshooting proves insufficient, it’s time to investigate the physical aspects of your laptop.
Speaker Diagnostics: If the diagnostics tests indicate a problem with your laptop's internal speakers, a deeper inspection may be necessary. Laptop speakers are tiny and often housed within the chassis.
- Gentle Handling: Be exceptionally careful when disassembling your laptop. Refer to your laptop's service manual or online guides for safe disassembly procedure.
- Visual Inspection: Carefully examine the speaker. Look for any visible damage or loose connections.
- Contact Restoration (Use with Caution): If connections appear slightly loose, try gently reseating them. Caution: Avoid excessive force, which might damage the fragile components.
- Professional Assistance: Unless you have experience with laptop hardware repairs, consider contacting a qualified technician.
Audio Jack Check: Inspect the audio jack (headphone jack). Is it physically damaged? A bent or damaged jack can prevent audio from reaching your internal speakers.
- Debris Removal: Use compressed air to remove any dust or debris that might be interfering with the jack's connections.
- Testing: Try inserting and removing headphones or an audio cable multiple times. Sometimes this can help re-establish contact.
6. The Culprit: Third-Party Software Conflicts
Occasionally, third-party software can interfere with your laptop's audio functions.
Recent Installations: Think back to any newly installed software around the time the audio issues started. A specific program might be at fault.
- Uninstalling and Testing: Try uninstalling the problematic software to see if it resolves the issue. Restart your laptop after uninstallation.
Audio Management Software Conflicts: If you have multiple audio management utilities installed (e.g., software from your sound card manufacturer, third-party sound enhancers), conflicts might arise. Experiment with disabling or uninstalling these programs one at a time, restarting your laptop after each change, to isolate the source of the conflict.
7. System Restore: Reverting to a Previous State
If all else fails, you can restore your system to a previous state when the audio was working correctly.
System Restore Point: Windows periodically creates system restore points, which are snapshots of your system files and settings at a specific time.
- Accessing System Restore: Search for "Create a restore point" in the Windows search bar.
- Choose a Restore Point: Select a restore point from a time when your audio was functioning correctly.
- Follow On-Screen Instructions: Windows will guide you through the restore process. Note: This will revert your system to the state it was in at the time of the chosen restore point, but it won't affect most of your personal files.
8. The Final Resort: Professional Consultation
If, after exhaustive self-troubleshooting, the audio difficulties persist, it may be time to seek professional help. A qualified technician will possess the expertise and tools to comprehensively diagnose more complicated hardware failures, and is ready to provide the necessary solutions.
- Laptop Repair Services: Research reputable laptop repair services in your area.
- Warranty Information: If your laptop is still under warranty, contact the manufacturer's customer support.
- Detailed Description: Provide the technician with a detailed description of the problem, the troubleshooting steps you've already taken, and any relevant information. This can significantly aid in the diagnosis process.
By methodically working your way through these troubleshooting steps, you'll significantly increase your chances of restoring sound to your laptop. Remember to start with the simplest solutions and gradually progress to the more complex ones. Often, the fix is simpler than you might think.
