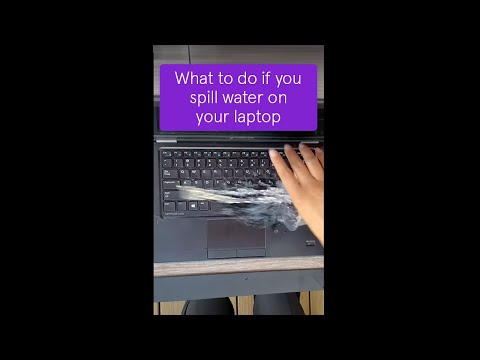
spilled water on laptop touchpad not working

Title: Laptop touchpad pointer erraticdysfunctional after liquid contact - fix
Channel: Peppermint
Laptop touchpad pointer erraticdysfunctional after liquid contact - fix by Peppermint
spilled water on laptop touchpad not working, spilled liquid on laptop touchpad not working, how to get water out of touchpad on laptop, hp laptop touchpad not working after water spill
Laptop Touchpad Dead After Spilled Drink? 😱 THIS FIXED IT!
Laptop Touchpad Troubles? Don't Panic! (It Might Not Be Goodbye)
Oh no! The dreaded spill. That icy beverage or rogue coffee now has a brand new target: your precious laptop. But is your laptop touchpad truly gone for good after an accidental liquid intrusion? Before you resign yourself to a life of external mice or, heaven forbid, a whole new laptop, take a deep breath. There’s hope! And believe it or not, often, a fix is within reach. So, let’s delve into how to potentially resurrect your lifeless touchpad.
The Immediate Aftermath: Act Fast!
Time is of the essence. The moment you witness the liquid assault, swift action is crucial. First, and foremost, immediately power down your laptop. Don't attempt to save your work. Every second counts. Unplug the power cord. This is crucial to prevent short-circuiting. Next, flip your laptop upside down, preferably over a towel. This allows gravity to assist in the removal of liquid. You need to drain as much liquid as possible immediately.
Disassembly and Diagnosis: A Delicate Dance
Now for the tricky part. You likely need to open up your laptop. But proceed with extreme caution! Carefully examine your laptop’s user manual. These provide specific disassembly instructions. If you aren't comfortable, seek professional help. Otherwise, gather the necessary tools: small screwdrivers, plastic spudgers, and anti-static wrist straps. These will reduce the risk of electrostatic discharge.
Once inside, carefully disconnect the battery. Locate the touchpad ribbon cable. Examine it for any signs of corrosion or liquid residue. If you spot any, gently clean it using isopropyl alcohol (at least 90% concentration) and a cotton swab. Allow it to dry completely.
The Great Dry-Out: Patience is Key
Even after cleaning, patience is paramount. Let your laptop dry thoroughly. This can take anywhere from several hours to several days. The drying time depends on the extent of the spill. Place your laptop in a dry, well-ventilated area. Do not use a hairdryer. The heat can cause damage. Consider placing it near silica gel packets to absorb moisture.
Reassembly and Testing: Fingers Crossed!
After the drying period, it's time for reassembly. Carefully reconnect the battery and the touchpad ribbon cable. Make sure all screws are securely tightened. Then, power on your laptop. Hope for the best! Test your touchpad. Does it work? If yes, then congratulations! You may have successfully rescued your touchpad.
Software Shenanigans: Sometimes, It's Not Hardware
If the touchpad remains unresponsive, consider the software side. It's worth checking your touchpad settings in the operating system. In Windows, search for "touchpad settings." Ensure the touchpad is enabled. In macOS, navigate to System Preferences > Trackpad. Maybe you accidentally disabled it. Additionally, update your touchpad drivers. Outdated drivers can cause malfunctions. Visit your laptop manufacturer's website. Download and install the latest driver for your specific model.
When to Call in the Professionals: Know Your Limits
Sometimes, the damage is beyond DIY repair. If the touchpad still doesn't function after these steps, it may be time to consult a professional repair service. Complex internal hardware damage may exist. Liquid can cause corrosion on integrated circuits. A qualified technician has the expertise and equipment to diagnose more complex issues. They can also replace damaged components. Don't hesitate to seek help if you're not comfortable.
Preventative Measures: Avoiding Future Tears
Prevention is undoubtedly better than cure. Always keep liquids away from your laptop. Consider using a spill-proof keyboard cover. This offers an extra layer of protection. Regularly clean your laptop, including the touchpad. This prevents buildup of dust and debris. Treat your laptop with care. This will also extend its lifespan.
The Final Verdict: Triumph Over Disaster!
A spilled drink can be a scary event. But do not assume complete doom immediately. Following these steps significantly increases your odds of touchpad recovery. With some care and patience, you could potentially bring your laptop touchpad back to life. You'll potentially avoid expensive repairs. So, armed with this information, go forth and conquer. Good luck, and happy computing!
Gigabyte Laptop Keyboard DEAD? This FIX Will SHOCK You!Laptop Touchpad Dead After Spilled Drink? 😱 THIS FIXED IT!
Okay, let’s be honest. We’ve all been there. That heart-stopping moment when a rogue wave of liquid – whether it’s coffee, soda, or, in my case, a particularly mischievous glass of iced tea – decides your laptop is its new playground. And the aftermath? Usually, it involves a frantic scramble for paper towels, a prayer to the tech gods, and then… the dreaded realization: your touchpad is dead. It's unresponsive. Kaput. Gone to touch-happy heaven. But before you resign yourself to the agonizing fate of an external mouse or, worse, having to replace your beloved laptop, take a deep breath. Because, believe me, we've been through this, and we've learned a thing or two. This guide is our battle-tested survival manual for the aftermath of a laptop liquid invasion.
1. The Initial Panic: Don't Freak Out (Too Much!)
First things first: resist the urge to panic. I know, easier said than done, especially when that little arrow on your screen has decided to take an extended vacation. But trust me, a calm approach is your best weapon here. Running around screaming won't help (I tried). The key is to act fast, but deliberately. Think of it like a medical emergency: time is of the essence, but you need a steady hand.
2. Immediate Action: The Golden Minutes
This is where those swift reflexes come into play. Think of it as a race against corrosion. Every second counts.
- Power Down Immediately: Press and hold the power button until your laptop completely shuts down. Do not, under any circumstances, try to “save” your work. The priority is damage control.
- Unplug Everything: Unplug the power adapter. Remove any connected devices like USB drives, external hard drives, or anything else that might still be providing power to the system.
- Act Like You're on a Catastrophe Cleanup Crew: Flip the laptop upside down and gently shake it. The goal is to get as much of the liquid out as possible, the way a drowning person would cough water away. Do this over a towel, a sink, or anything absorbent.
3. The Dismantling Dilemma: To Open or Not to Open?
This is a tricky one, and the answer depends on your comfort level and your laptop's warranty. Opening your laptop voids most warranties, so consider that carefully. If you're feeling confident (or, like me, you're on a seriously tight budget), then proceed with caution. If not, skip to the next section (Professional Help) and then, if possible, call a tech support professional.
- Research is Key: Before you even think about touching a screwdriver, find the service manual for your specific laptop model online. YouTube is your friend here. Search for videos that detail how to disassemble your model. This will give you a visual roadmap of what you're getting into.
- The Right Tools: You'll need a small Phillips head screwdriver (the kind used for glasses and electronics), a spudger (a plastic prying tool), and possibly some antistatic wrist straps to not allow your fingers to transfer electricity.
- Take Photos (Lots of Them!): As you dismantle your laptop, take detailed pictures. This is your reference guide for reassembly. You'll be incredibly grateful later.
4. Gentle Cleaning: The Arsenal of Rescue
Once you've got the guts to bravely open your laptop (or if you've decided to go the professional route), it's time for the cleanup.
- Isopropyl Alcohol (90% or Higher): This is your best friend. It evaporates quickly and is relatively safe for electronics.
- Soft-Bristled Brush: A toothbrush or similar will do the trick to get into those nook and crannies.
- Microfiber Cloths: For wiping away the excess alcohol and liquid.
5. The Touchpad Tango: Targeted Cleaning
This is where we focus on the touchpad itself.
- Locate the Touchpad's Components: Carefully identify the touchpad ribbon cable and the touchpad itself.
- Isopropyl Alcohol Application: Dip the soft-bristled brush slightly into the isopropyl alcohol and gently scrub around the touchpad, its cable, and any connectors. Be careful not to let too much liquid run inside.
- Wipe It Down: Use a clean microfiber cloth to wipe away any remaining liquid.
6. The Drying Dance: Patience is a Virtue
This is crucial. You absolutely, positively cannot rush this stage.
- Air Dry: Leave all the components to air dry completely. Give it AT LEAST 24 hours. 48 is even better.
- Avoid Heat: Do NOT use a hairdryer or put your laptop in direct sunlight. Excessive heat can warp components.
- Rice Is (Mostly) Useless: Yes, the old rice trick is overrated. It's not very effective and could even trap moisture.
7. The Reassembly Ritual: A Reverse Engineering Masterclass
Now, the moment of truth. This is where those photos you took come in handy.
- Reverse the Steps: Carefully put everything back together, following your pictures and the service manual.
- Tighten Screws Gently: Don't overtighten screws.
- Double Check Everything: Before you completely seal the laptop, double-check that all the components are connected properly, especially the touchpad ribbon cable.
8. The Power-Up Prayer: Fingers Crossed!
Plug in the power adapter, avoiding the external devices for now, and press the power button.
- Gradual Introduction: If it boots up, celebrate, but don't get overexcited.
- Test the Touchpad: Does it work? Great! If it doesn't, don't panic.
- Test Everything Else: After the touchpad test, plug in the external devices, then test your laptop's other functions, such as the Wifi and the sound.
9. When to Seek Professional Help: Know Your Limits
There's a point where DIY just isn't the answer.
- Beyond Your Skill Level: If you're not comfortable disassembling your laptop, don't force it.
- Severe Corrosion: If you see extensive corrosion on the components, a professional will have the tools and expertise to address it.
- Water Damage Isn't The Only Probem: If the spill was just a bit of water then cleaning would be sufficient, but if it was a corrosive drink (soda, juice) then more advanced corrosion might require professional intervention.
10. The Prevention Playbook: Avoiding Future Disasters
The best way to fix a liquid-damaged laptop is to prevent it from happening in the first place.
- No Drinks Near the Laptop: This is the golden rule.
- Invest in a Spill-Proof Keyboard Cover: These are relatively inexpensive and can save you a lot of headaches.
- Consider a Wireless Mouse: This eliminates the need for your fingers to be on the touchpad at all times.
11. Assessing The Damage: The Long-Term Look
Even if your touchpad miraculously springs back to life, there might be lingering issues.
- Potential for Future Problems: Water damage can cause shorts and a gradual decline in functionality over time.
- Back Up Your Data: Immediately back up all your important files.
- Monitor the Laptop's Performance: Keep an eye out for unusual behavior, like overheating or performance lag.
12. Data Recovery: If The Worst Happens
If your laptop is completely fried and you can't access your data, there's still hope.
- Professional Data Recovery Services: These specialists can often retrieve your files even if your laptop is dead.
- Act Quickly: The sooner you take action, the better your chances of data recovery.
13. The Warranty War Zone: Claiming the Unclaimable?
This is rarely straightforward.
- Water Damage Isn't Covered (Usually): Most laptop warranties do not cover liquid damage.
- Check Your Insurance: You might have coverage through your home or renter's insurance.
14. Learning From the Spill: Post-Traumatic Laptop Disorder
It's okay to be a little traumatized.
- Take a Deep Breath: Remind yourself that you've learned important lessons.
- Embrace a New Vigilance: You'll be much more careful around liquids from now on.
- Celebrate the Victory (If You Achieved It): You've survived a tech emergency!
15. The Ultimate Lesson: You Can Do This!
The moment your touchpad goes dead after a spill is terrifying. But don't give up hope! We've successfully resurrected laptops from the brink of death. Remember, a calm approach, decisive action, and a little bit of elbow grease can make all the difference. You've got this! Now go forth and conquer that unresponsive touchpad!
In conclusion, dealing with a dead touchpad after a spill is like navigating a tricky maze. The path to recovery involves a series of careful steps, from the initial panic to the assessment of long-term damage. While it can seem daunting, remember that you're not alone. We've all been there. By following the steps outlined above
Does NOW TV ACTUALLY Work on Laptops? (The SHOCKING Truth!)Fix M1 MBPro trackpad

By Zoran Angelov Fix M1 MBPro trackpad by Zoran Angelov
Spilled water on your laptop Here's what to do shorts
By Asurion Spilled water on your laptop Here's what to do shorts by Asurion
Water Spilled on Laptop - What To Do

By A-Plus IT Group, Inc. Water Spilled on Laptop - What To Do by A-Plus IT Group, Inc.

Title: M2 MacBook Air Liquid Spill Repair No Trackpad and Keyboard
Channel: lapfix
M2 MacBook Air Liquid Spill Repair No Trackpad and Keyboard by lapfix
Laptop Wifi Connect
Here's the article, crafted to be a superior competitor:
Mastering the Art of Fermenting Vegetables: A Comprehensive Guide to Cultivating Delicious and Nutritious Probiotics
We have long understood the profound connection between our gut health and overall well-being. Fermented vegetables, brimming with beneficial probiotics, offer an accessible and delicious pathway to cultivate a thriving microbiome. This detailed guide will navigate the intricate world of vegetable fermentation, providing you with the knowledge and techniques to create vibrant, flavorful, and health-boosting creations in your own kitchen. Forget bland supermarket options; we will empower you to craft fermented masterpieces that will tantalize your taste buds and nourish your body from the inside out.
Understanding the Science Behind Vegetable Fermentation
At its core, vegetable fermentation is a dynamic process driven by the activity of beneficial bacteria, primarily lactic acid bacteria (LAB). These microscopic powerhouses thrive in an anaerobic (oxygen-free) environment, consuming the natural sugars present in vegetables and converting them into lactic acid, carbon dioxide, and various other compounds. Lactic acid acts as a natural preservative, creating an acidic environment that inhibits the growth of harmful bacteria, thus extending the shelf life of the vegetables. Further, the fermentation process enhances the nutritional bioavailability of the vegetables, making vitamins and minerals easier for our bodies to absorb.
The LAB cultures employed in vegetable fermentation are naturally present on the vegetables themselves, as well as in the surrounding air. This spontaneous fermentation is what gives fermented foods their diverse and complex flavors. However, we can optimize the fermentation process by controlling key factors, like salt concentration, temperature, and time, to achieve desired results. Understanding these fundamental principles lays the groundwork for successful and consistently delicious ferments.
Essential Equipment and Ingredients for Vegetable Fermentation
The beauty of vegetable fermentation lies in its simplicity. You'll need relatively few pieces of equipment to get started. However, investing in quality tools will significantly improve your fermentation experience and the quality of your final product.
Glass Jars: Wide-mouth glass jars are ideal for fermentation. The wide opening facilitates easy packing and unpacking of vegetables. Ensure the jars are clean and sterile. Quart-sized jars are a manageable size for beginners.
Fermentation Weights: These are crucial to keep the vegetables submerged below the brine, preventing mold and spoilage. Glass fermentation weights and ceramic weights are both excellent options.
Airlock Lids or Tight-Fitting Lids: Airlock lids allow carbon dioxide to escape while preventing oxygen from entering, fostering the anaerobic environment critical for successful fermentation. If using a standard lid, you'll need to "burp" the jars daily to release pressure.
Cutting Board and Knife or Mandoline: Prepare your vegetables efficiently and safely. A sharp knife is essential.
Measuring Cups and Spoons: Precise measurements are vital for achieving the correct salt concentration.
As for ingredients, the core requirements are straightforward:
Fresh Vegetables: Select high-quality, seasonal vegetables at their peak ripeness. Experiment with a variety of vegetables to discover your favorite flavor combinations. Cabbage, carrots, cucumbers, radishes, and green beans are all excellent choices.
Salt: Use uniodized salt, such as sea salt or kosher salt. Iodized salt can inhibit the fermentation process. The salt provides flavor, draws out moisture, and inhibits the growth of undesirable bacteria.
Water: Use filtered, chlorine-free water. Chlorine can also interfere with the fermentation.
Optional Flavorings: Herbs, spices, garlic, ginger, and chili peppers can add depth and complexity to your ferments. Explore different flavor profiles to create unique and exciting recipes.
Step-by-Step Guide to Fermenting Vegetables: A Practical Approach
Following these clear steps will ensure your fermentation journey begins on a successful note:
Prepare the Vegetables: Thoroughly wash all vegetables. Trim away any blemishes or damaged areas. Chop, shred, or slice the vegetables according to your recipe. This increases the surface area, allowing the LAB to work their magic more effectively.
Combine Vegetables and Salt: In a large bowl, combine the prepared vegetables with the measured amount of salt. The general rule of thumb is 1.5-2 tablespoons of salt per quart of water. Massage the vegetables and salt together for several minutes. This process will help release moisture, creating the brine in which the vegetables will ferment. The massaging process also helps soften the vegetables.
Pack the Jars: Tightly pack the salted vegetables into your clean glass jars. Use a tamper or your fist to compact the vegetables and release any trapped air pockets. Ensure there is enough headspace at the top of the jar (approximately 1-2 inches) to allow for the expansion of gases during fermentation.
Add Brine (If Necessary): If the vegetables have not produced enough brine on their own (especially with drier vegetables), you'll need to add a prepared brine. Combine the required amount of salt and water in a separate container. Stir until the salt is completely dissolved. Pour the brine over the vegetables, ensuring they are fully submerged.
Weigh Down the Vegetables: Place a fermentation weight on top of the vegetables to keep them submerged below the brine. This prevents mold and spoilage caused by exposure to oxygen.
Seal the Jars: Secure the lids of the jars. If using airlock lids, ensure the airlock is filled with water.
Ferment at Room Temperature: Place the jars in a cool, dark place, away from direct sunlight. The ideal fermentation temperature is between 60°F and 75°F (15°C and 24°C). Colder temperatures will slow down the fermentation process, while warmer temperatures will accelerate it.
Monitor and Taste: During the fermentation period, check the jars regularly. If using a standard lid, "burp" the jars daily by opening them briefly to release any built-up pressure. Taste the vegetables periodically to gauge their progress. The taste will evolve over time, becoming progressively more sour and complex.
Refrigerate to Slow Down Fermentation: Once the vegetables have reached your desired level of sourness, transfer the jars to the refrigerator. The cold temperature will slow down the fermentation process, preserving the vegetables and extending their shelf life.
Troubleshooting Common Fermentation Challenges
Even with careful preparation, occasional issues may arise. Knowing how to address these challenges can save your batch and enhance your learning curve:
Mold: Mold growth is often the result of vegetables not being fully submerged in the brine or of introducing unwanted bacteria. If a thin white film appears on the surface, it's likely kahm yeast, which isn't harmful (but can alter flavor). Simply skim it off. If fuzzy, colored mold appears, discard the entire batch. Ensure your equipment is clean, your vegetables are submerged, and your salt concentration is correct to minimize mold risk.
Soft or Mushy Vegetables: This can be caused by using vegetables that are not fresh, a salt concentration that’s too low, or fermentation at a temperature that is too warm. Ensure fresh vegetables, proper salting, and appropriate temperatures.
Unpleasant Odors: The fermentation process can produce a variety of odors. However, a strong, foul odor indicates a problem. Discard the batch if you detect off-putting smells.
Too Sour: The fermentation process is all about time. Taste your vegetables daily after about a week to determine your preferred level of sourness. You can transfer your vegetables to the refrigerator when they reach your target tartness.
Exploring Diverse Fermented Vegetable Recipes
The possibilities for fermented vegetable creations are virtually limitless. The following recipes are excellent starting points:
Classic Sauerkraut: Shredded cabbage, salt, and caraway seeds are all you need. Follow the steps above for preparing, salting, packing, weighing, and fermenting.
Simple Fermented Carrots: Shredded carrots, salt, and optional spices, like ginger or dill.
Spicy Kimchi: A Korean staple. Napa cabbage, gochugaru (Korean chili flakes), garlic, ginger, and other seasonings. This recipe requires more advanced preparation, but the result is a spicy and savory delight.
Fermented Cucumber Pickles: Cucumbers, salt, dill, and garlic. Follow the steps above for brine ratio, packing, and fermentation.
Integrating Fermented Vegetables into Your Diet
Fermented vegetables offer many opportunities to enhance your meals. Consider these serving suggestions:
As a Side Dish: Serve fermented vegetables alongside your main courses.
In Salads: Chop and add them to salads for added flavor and texture.
As a Topping: Use fermented vegetables as a topping for tacos, sandwiches, or burgers.
In Soups and Stews: Stir them into soups and stews at the end of the cooking process to preserve their beneficial probiotics.
As a Snack: Enjoy them directly from the jar.
The Long-Term Benefits of Fermented Vegetables
Regular consumption of fermented vegetables can provide enormous health advantages. The probiotics in fermented foods contribute to a healthy gut microbiome, which is linked to improved digestion, enhanced immunity, reduced inflammation, and better mental health. Embrace the art of vegetable fermentation, and unlock a world of flavor, health, and culinary creativity in your own kitchen. Your body (and your taste buds) will thank you.
